This blog will detail 1,000 video hikes in Southern California. By Southern California, I am drawing a line from San Luis Obispo to the Nevada Border. Anything south of that line will be declared "Southern California". In a way, it is a personal challenge to do so many hikes. Mainly, however, it is my way of showcasing how many hiking opportunities there really are right in our own geographic back yard. As a blog, it serves as a companion piece to my Youtube channel "1,000 Hikes in So Cal". It is also a work in progress, as I don't actually have 1,000 edited videos completed. This will take effort for quite some time before it is declared done. Even then, there will still be more out there. Here's to hiking and all the positive effects it has had on my life...and possibly yours!
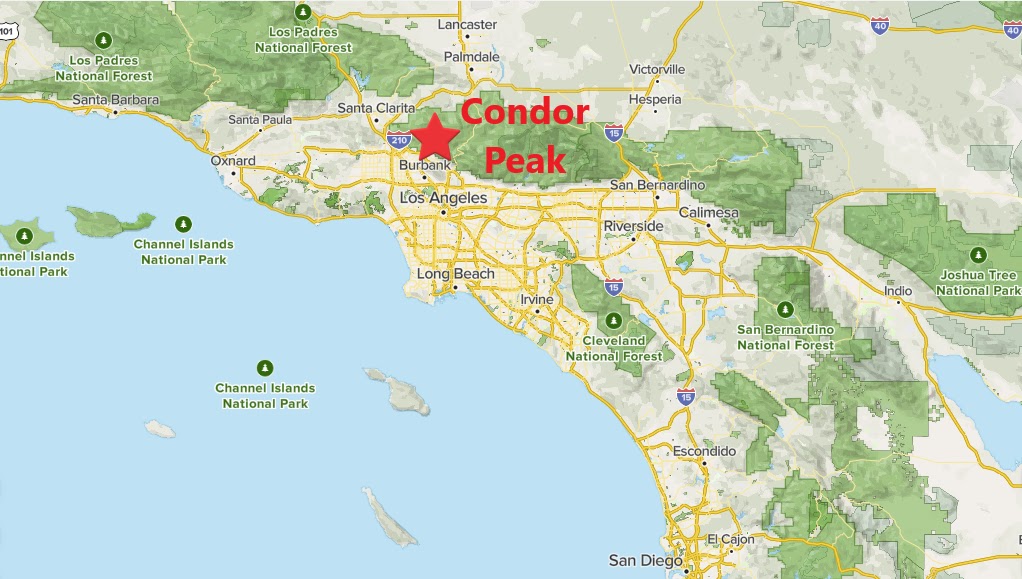
Summary After visiting Iron Mountain #2 the week before, I found myself salivating while being so close to Condor Peak. I had been coveting Condor Peak for a long time, so I was eager to get to it once the next weekend arrived. Despite my eagerness, my first concern was childcare. Once I got that taken care of, I got off to a bit of a late start by starting off at about 10:30AM. Since it was a day before Halloween, the days were getting shorter, so concerns about finishing before dark were a concern in the back of my mind. However, I was focused on getting to the summit.
View of the ridge early into the hike.
When starting out, I encountered a hunter hanging out by the trailhead. This was a reminder that it was hunting season, but it was also the only other human I saw on the trail the rest of the day. The use trail I started out on was a shortcut to the Condor Peak Trail, which has a trailhead about 1.5 miles down the road (thereby trimming about 3 miles on the hike). The use trail meets the proper trail quickly, followed by a gradual but long climb to the Fox Mountain / Condor Peak saddle. The trail levels temporarily there before more climbing to come toward Condor Peak.
Condor Peak from the saddle.
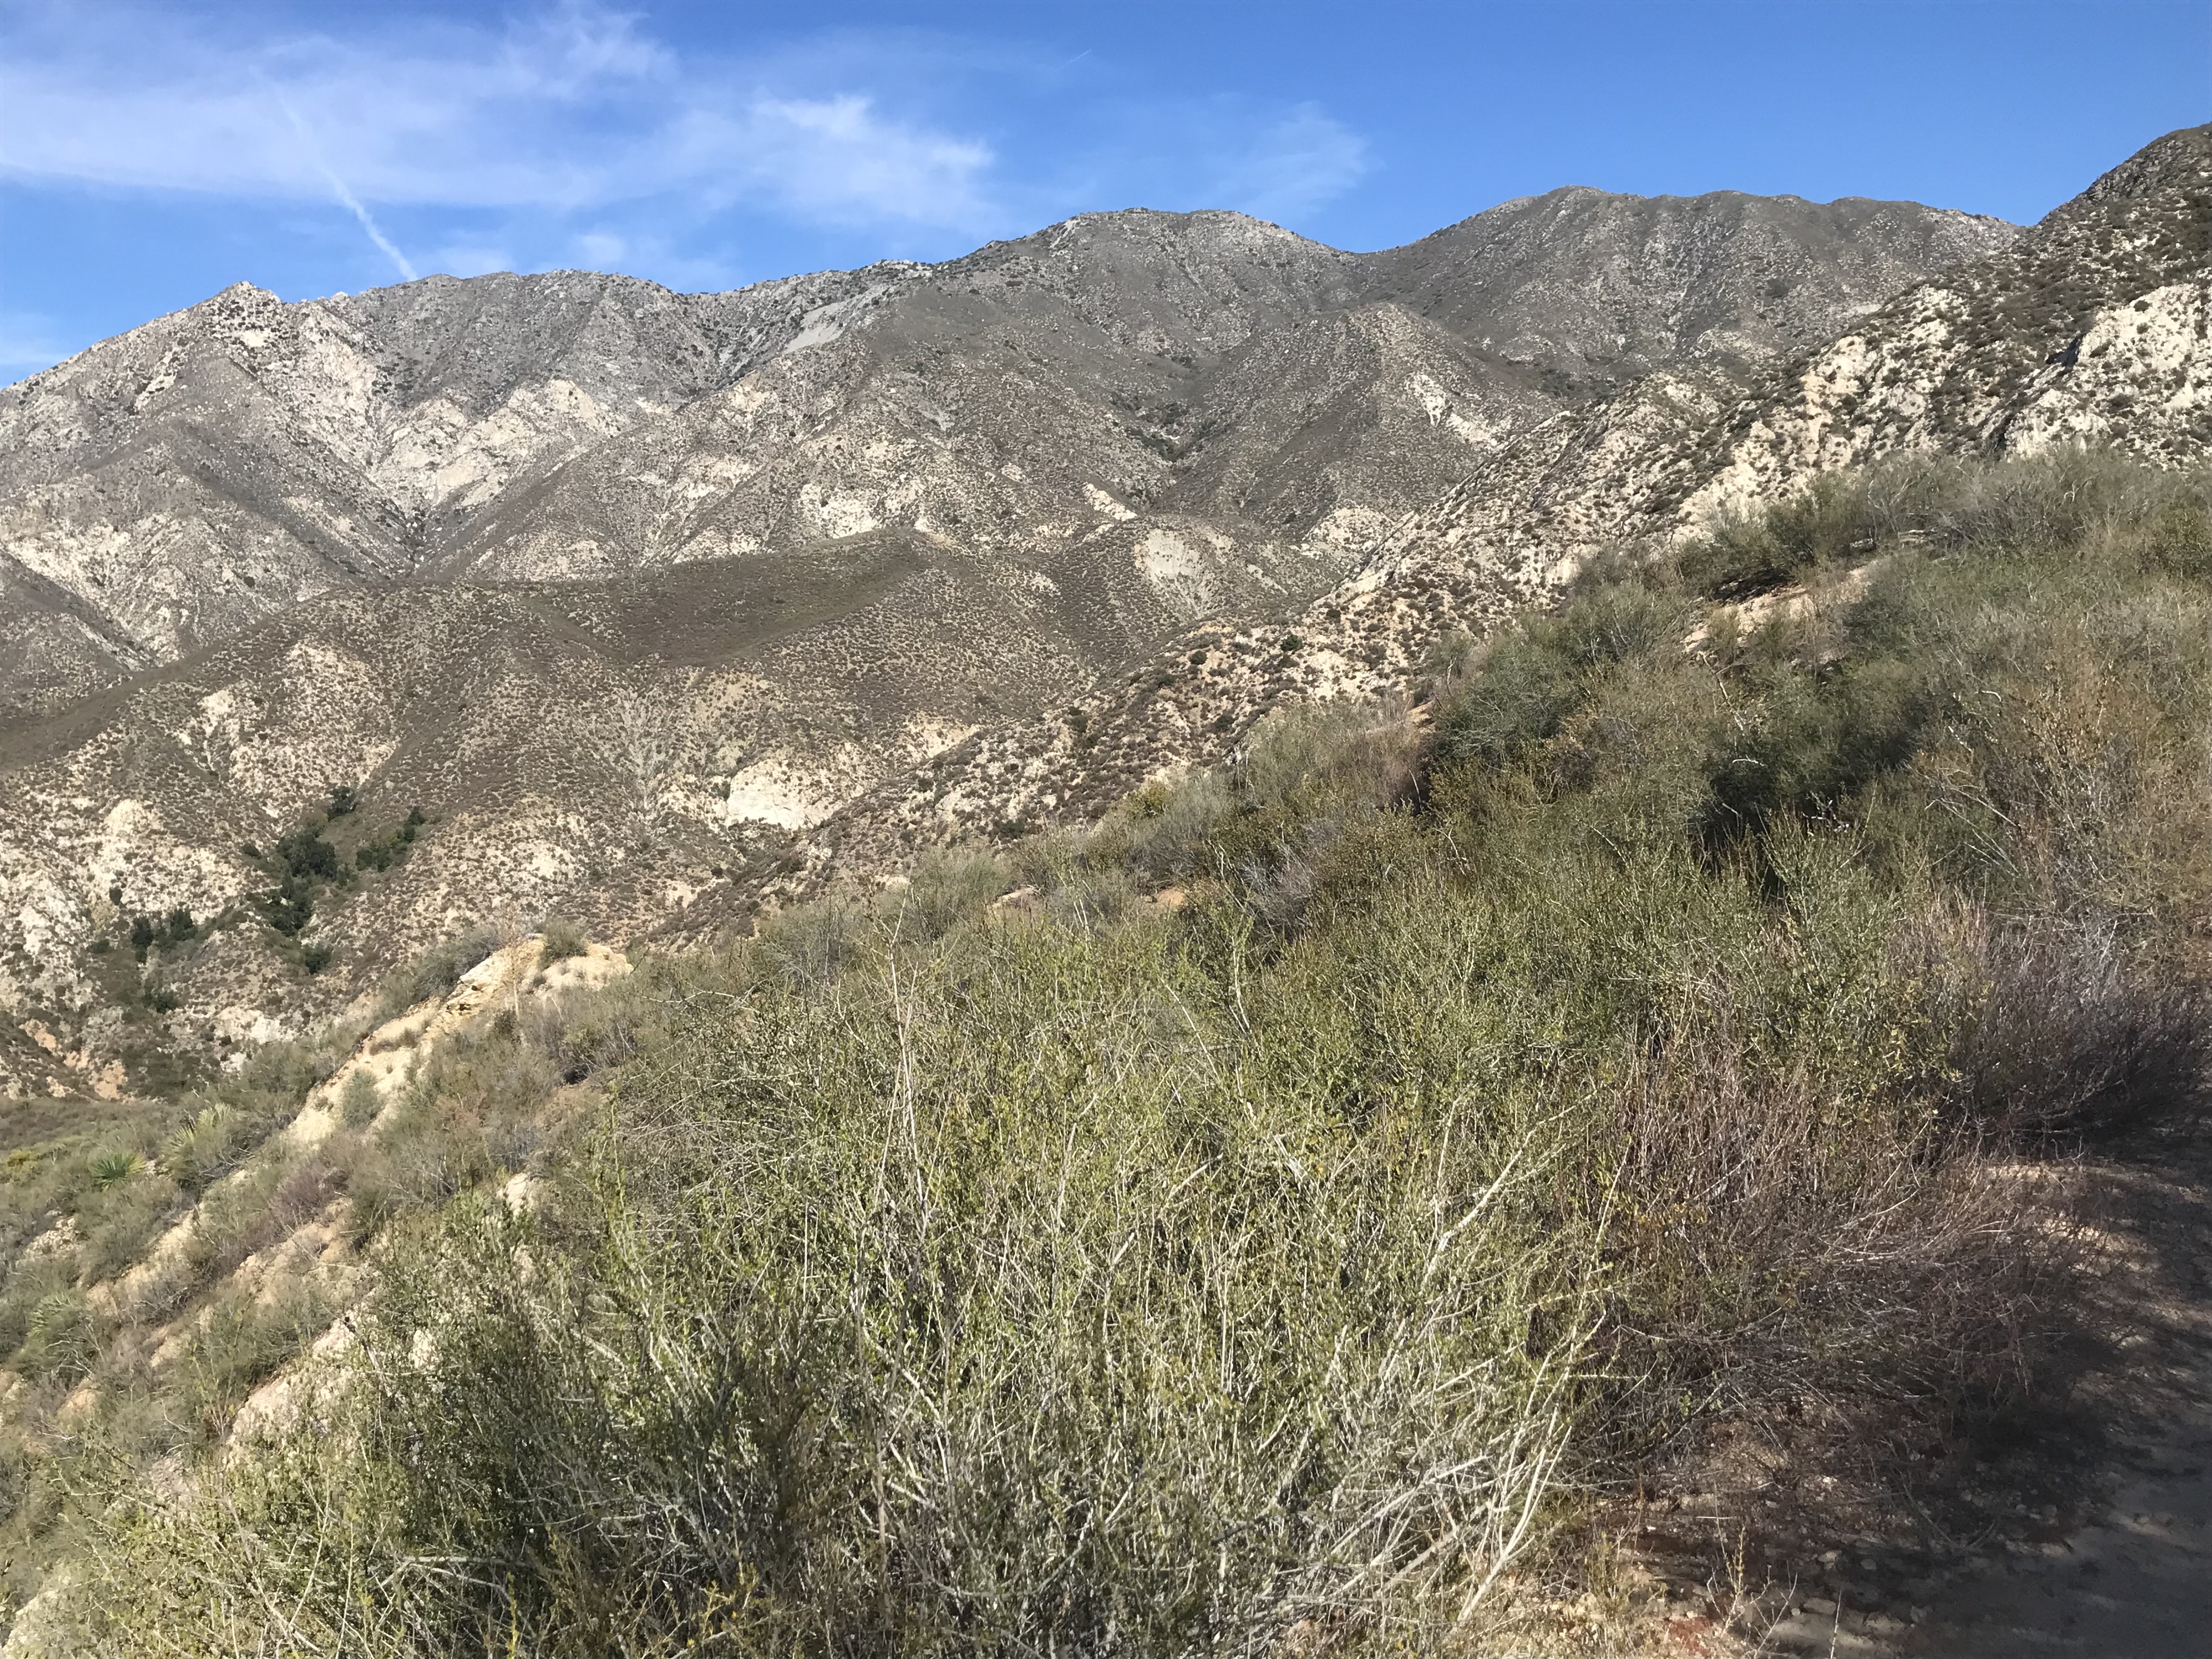
With the destination in sight, I felt the excitement while working up the slope. This one was a truly satisfying climb for me, since I had been wanting to do it for years.
Going up the ridge.
So as I arrived at the summit, I enjoyed the moment and the views. This time, I was looking toward Iron Mountain #2 in the views (opposite view from the previous week). I briefly contemplated continuing on to Condor Point, which is one of the other rarely visited peaks in the area, but my late start quickly wiped that thought out.
Approaching the summit.
After some quality summit time, I headed back down. I bypassed Fox Mountain on the way down again, not only due to the lateness of the day, but also because I had already been there in the past. It's a good thing I continued, because daylight faded into darkness by the time I reached the parking area. Made it back just in time!
Iron Mountain #2, not to be confused with #1, or #2, is left to be the middle child of the "Iron Mountain" named peaks of the San Gabriel Mountains. Each peak is dispersed within the range, so they are not neighboring peaks. Due to the similarity in naming, this causes the peak to be a bit lost in the shuffle. It doesn't help that the best way to access it is via Mt Gleason Road, which is often closed for long periods during the year. Meanwhile, one of its nearest neighbors is the coveted hikers destination of Condor Peak. Despite being taller than Condor Peak, Iron Mountain #2 is less visited.
Leaving the road and going up the ridge.
I began the hike outside of Lightning Ridge Group Campground, which is near the intersection of Mt Gleason Rd and Mendenhall Ridge Road. The hike stays on Mendenhall Ridge Road while going downhill toward Iron Mountain. The gradual downhill eventually levels at a saddle near Iron Mountain. A road goes left here toward Condor Peak, but the Iron Mountain hike continues forward.
Staying on top of the pointed ridgeline.
Shortly beyond the junction, a use trail leaves the road and rises to the summit of Iron Mountain. There are a few false summits which were only minor inconveniences, The summit has an impressive 360 of the San Gabriel Range.
Approaching the summit.
I would say that this mostly qualifies as an upside down hike. This, of course, means that most of the climbing for the hike occurs on the way back. When getting close to the parking area, the road enters the shade of the forest. This let me know that I was getting closer to the end of the line.
On the summit.
The road passes below Rocky Benchmark (which is an optional side trip that can easily be added to this hike). While returning to Lightning Ridge, the hike came to an end at the shaded parking area outside of the campground.
Part driving tour and part hike, both the car and the trails had a co-starring role in this one. However, that being said, most of the drama was on the road. The road was paved for about 7 miles to just below Magic Mountain. To make it seem like it took a little bit of effort, I walked the half mile up the summit road to reach Magic Mountain. Buildings and towers sit on top and fences prevented me from officially standing on the highest point. I had contemplated hiking to this peak in the past (about 15 miles round trip), but I had timed it just right and found the gate open for hunting season. Every other vehicle out there were hunters, but I was just determined to knock off some of the peaks that I could not get to easily otherwise.
Messenger Peak Hiking Map.
I returned to the car and pressed forward on Santa Clara Truck Trail (Forest Route 3N17). Here is where things got rough. The road turned to a sandy rocky mess, and often times overgrown with foliage that scratched the side of my car when passing. Despite the difficulties, I was determined to continue pressing forward.
Approaching Messenger Peak.
It was about 15 miles of getting battered around on the road before I reached the access trail for Messenger Peak. After finding a place to park, I set off on foot. The car certainly did most of the work, since the peak is so far away when hiking from any "civilized" parking areas. Meanwhile, I parked close enough so that this was also an easy hike (about 1.2 miles RT).
On the summit.
Rocky Benchmark Hiking Map.
Next up was Rocky Benchmark. This is a notable high point next to Lightning Point Group Camp.
Lightning Point Group Camp.
This was another rather easy hike to the high point (1.5 miles RT), where I found a hunter sitting on top of with his rifle ready to operate. After an awkward interaction (since I didn't have antlers), I simply headed back and went on my way.
Mt Gleason Hiking Map.
The last peak to visit was Mt Gleason. This is the highest peak in the area, but it is reached by hiking on a deteriorating paved road for about a half mile. The driving surface also became paved after leaving the Rocky Benchmark parking area, which helped to reduce the driving drama. In fact, the hike was no drama as well, since it visited the wide summit, which had no official marker the summit as far as I could tell.
Mt Gleason summit.
There are a few more official peaks on the way down the road to Angeles Forest Highway, but I had already visited them in the past while on a long Pacific Crest Trail hike a few years ago. Because of that, I closed it out there and called it a day!
The hike is part of Michael D Antonovich Regional Park, located in the hills behind Porter Ranch. Despite being near the city, the area is rather remote. Meanwhile, the hike follows paved and dirt roads all the way to the summit.
Hiking the roadway.
The roads passes through some ranch lands and nearby a retired Nike Missile site. The whole while, the prominent towers on top of the peak hovers above the road. Near the top, the road passes through some nice oak groves. Despite the oaks, the route has very little shade, so by being there on a cool day I enjoyed the day a little bit better.
Oat Mountain framed by an oak tree.
On the summit, there are multiple buildings and fences. I worked my way to the towers on the highest point, but was not able to officially stand on the exact highest spot, due to locked gates. Being in the neighborhood of the high point is good enough, though. Dirt roads continued downhill toward the east, but I had no reason to head out that way (plus I wasn't sure of any nearby private property). Therefore, I returned the way I came and declared victory.
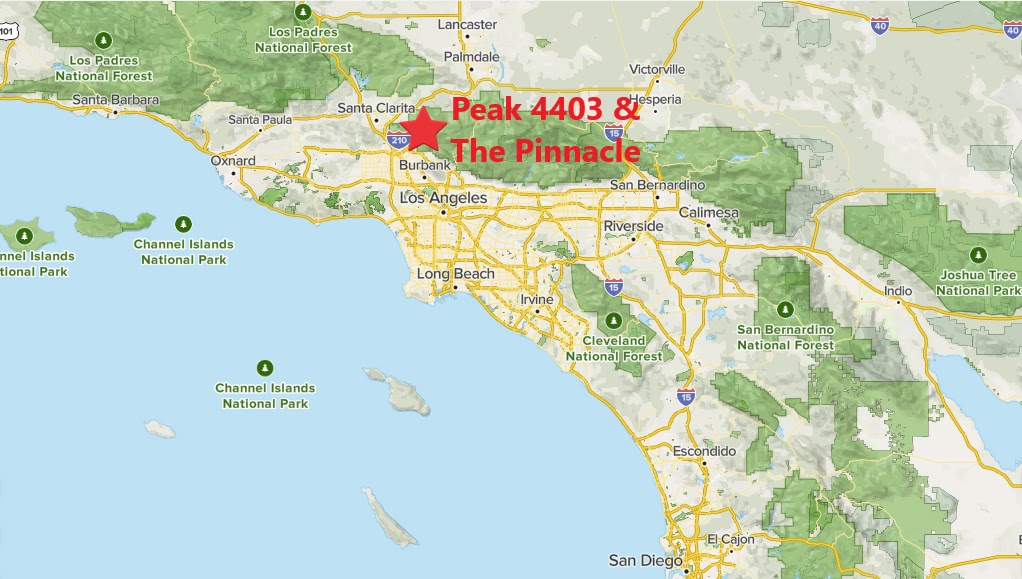
From Kagel Mountain Trailhead, pick up the trail on the north side of the parking area. This is Forest Route 4N35. The road wraps around the lower slopes of The Pinnacle to the west and then to its north slope. In about 2.8 miles, the road arrives at Highline Saddle. At this point, I left the road and picked up a use trail which climbs steeply toward Peak 4403.
On the summit looking toward Mendenhall Peak.
Although there isn't much on its summit, it is a nice vantage point in between Mendenhall Peak and The Pinnacle. If Mendenhall Peak was on my list for the day, it would've been a quick scamper along the ridge to reach it. However, The Pinnacle was the second peak of choice for the day.
Looking back at Peak 4403 on the way to The Pinnacle.
To head toward The Pinnacle, I had to drop straight back down to Highline Saddle. Once there, I continued to the opposite side of the ridge and began ascending to The Pinnacle.
Heading along the ridge to The Pinnacle.
The ridge is pretty well defined despite the undulations. Just below The Pinnacle, the ridge line makes a very steep rise before leveling out near the top. At the high point, the peak is marked. Summit views are just as good as they are from Peak 4403.
Approaching The Pinnacle.
The parking area is nearly a straight drop from there, however, there is no good use trail leading down. Instead of simply going for it, I retreated to a point halfway back to Highline Saddle and cut down the slope at a point where the ridge crossed near FR 4N35. After the short bushwhack, it was a quick return to the parking area. If not opting for the bushwhack, the return to Highline Saddle and walking the road back would add an additional mile.


